
Max Simmonds
M.Eng (Hons) First Class
Software engineer at Starship Technologies and co-founder of Purple Parrot. Previously at CERN and ESA. MEng (Hons, 1st) from the University of Plymouth. Based in Tallinn, Estonia.
Project Status
Aurora Sign
08/03/26
So, I need a sign that says “Aurora”. I thought it would be cool to use the NASA type font, so I found a site that generates you NASA text, and downloaded the image. I then imported that to OnShape, and drew around it:
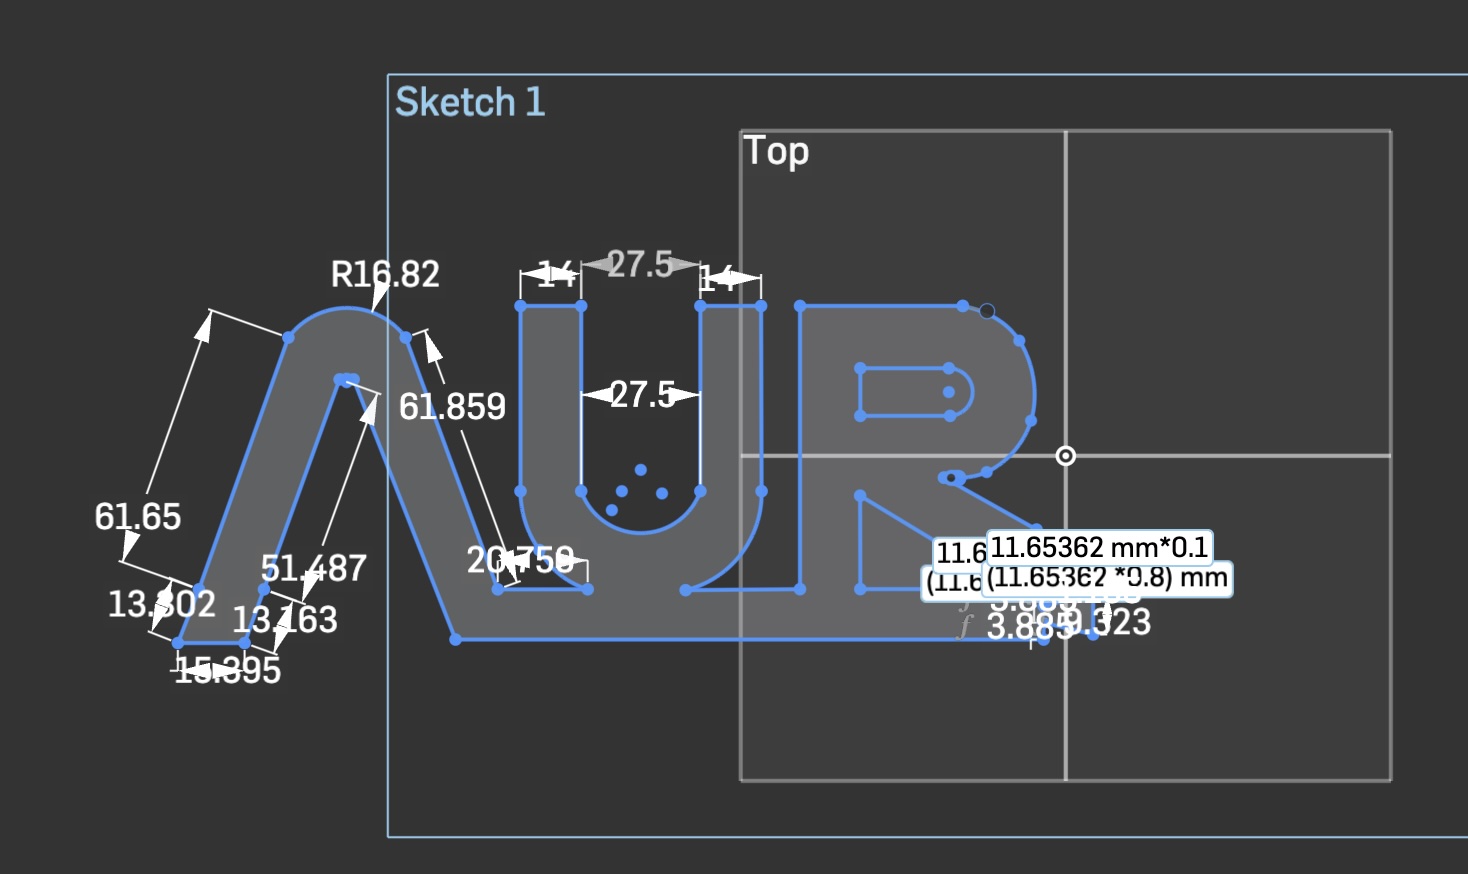
You’ll notice that this is only half of the word. I wanted the sign pretty big, so I made it 400mm, but, my print bed is only 200x200. So, I cut the design, and added a dove tail joint so that I can join the two parts of the sign together.

Then, I extruded the part.


Then, I needed LED holes! I had 50 of these RS components LEDS, which are pretty much neopixel LEDS, but with a slightly different pin out - same library works with it, though.
Next, it was time to print. I loaded up both parts into OrcaSlicer, and an hour later I had my two part sign!
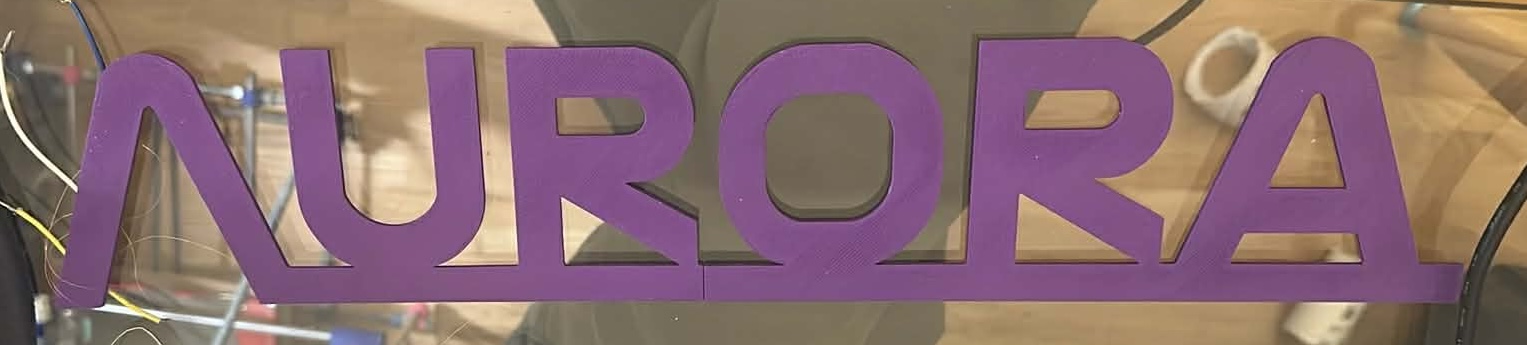
There we have it!
10/03/26
Okay, so I’ve been working on this a little, but not much. Tomorrow is the deadline, so I will have to pick up pace then. For now, I changed tack a little.
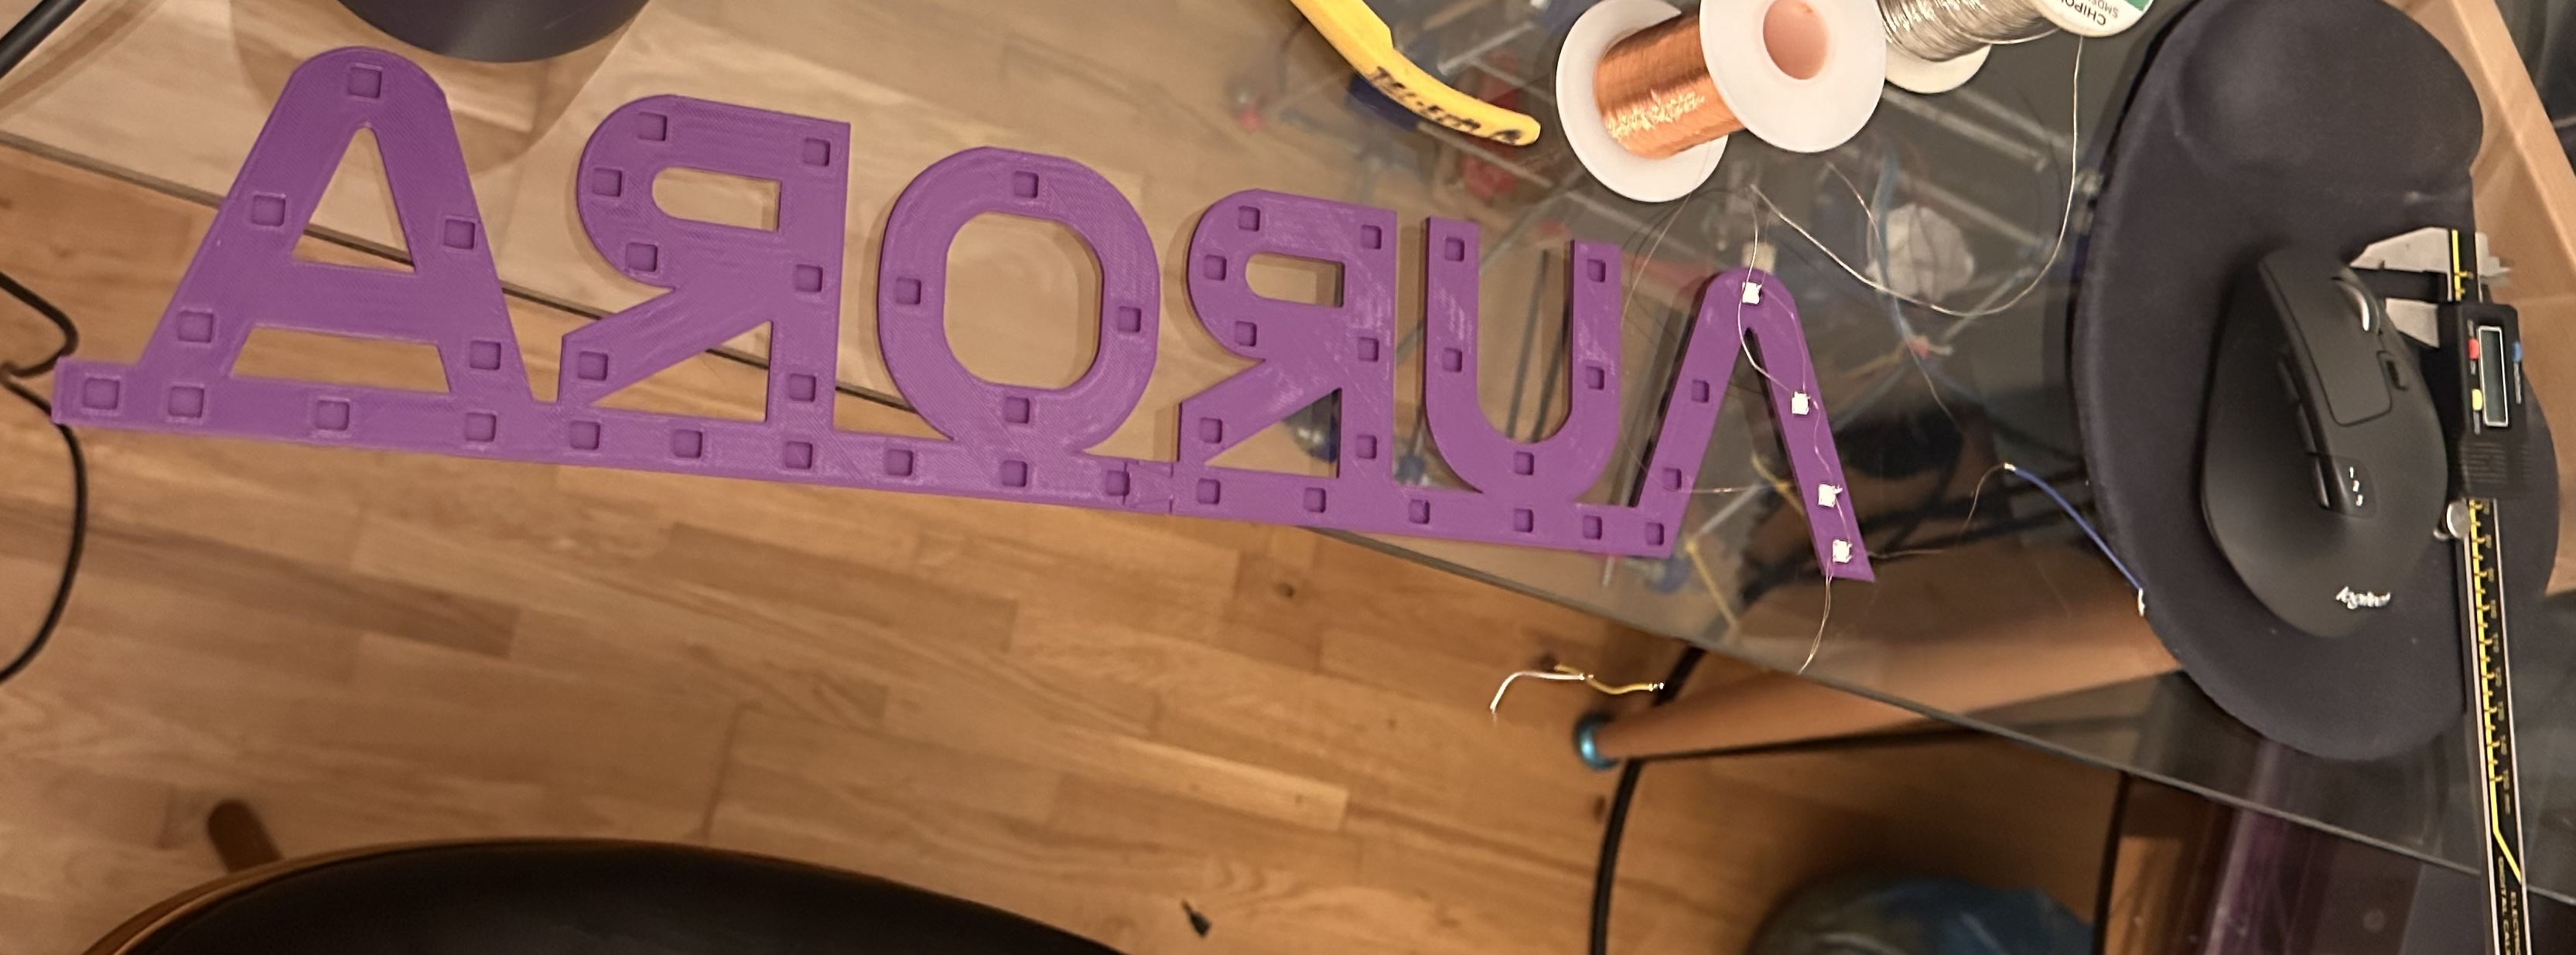

Above we have two images. I initially started with very thin, 0.8mm, enameled wire. This was, I thought, a good idea. I could quickly tack them on to each pad that I needed. It was thin enough to quickly burn through the enamel and solder to the pad. They’d be thin, won’t short out when touching each other, etc. Alas, it didn’t work out that way. I was getting a lot of lack of contact between wire and pad, they were brittle and would snap, there’s no rigidity and so wouldn’t stay in place, etc. etc.. So, I went with the more standard approach - using 22 AWG wire. You can see how I’ve daisy chained them on the image on the right. I now have a bunch more to do (but only ~50 LEDs available). I’ll get all these done tomorrow. Currently, the code is very simple and turns on each LED sequentially, in purple.
I also had an issue with oddities when string the LEDs together. The first would illuminate fine, but the second, third, forth, would change colour and eventually start “double counting” as if LEDs \(X\) and \(X+1\) were the same.
The issue was that these LEDs are RGB_W_. I forgot about the W. Easy fix in code. I’ll probably share the code here when I’m done (simple Arduino C++ code) and some oscilloscope shots of the data lines out of interest, too. But, only when I’ve soldered all those LEDs!
13/03/26
Okay, not too much of an update here – basically, I have soldered a few more LEDs and printed a base. The base is very much the same idea as the sign, I used dove tail joints, and there’s a hollow section at the bottom that houses the arduino. Once I have more LEDs soldered, I’ll give a full update, this will probably be the penultimate update (not much more interesting to update on until it’s all soldered up!)
26/03/26
Nothing too much to update, about a week ago I did more LEDs and got this nice smooth transition going:
I haven’t had much time to continue with this as I’ve been pushing for the Rocket Clock project to be completed before Artemis 2 launch on 1st April. I’ll leave this here for now to mark some progress, hopefully I’ll get more done after the Rocket Clock.